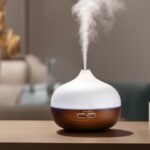
Cleaning an oil diffuser with alcohol is a simple yet crucial step in maintaining its performance and functionality. Whether you have an ultrasonic diffuser or an atomizing diffuser, proper cleaning techniques are vital to ensure the longevity and efficiency of your device.
When it comes to ultrasonic diffusers, start by turning off and unplugging the device for safety. Then, fill the water reservoir halfway with filtered water and run the diffuser for a few minutes to loosen any residue. Empty the reservoir, wipe it clean, and use a cotton swab dipped in rubbing alcohol to clean the ultrasonic plate thoroughly. Rinse the reservoir with water and wipe it dry to remove any remaining cleaning solution.
If you own an atomizing diffuser, the process is slightly different. Begin by turning off and unplugging the diffuser. Use a cotton swab dipped in rubbing alcohol to clean the diffuser, ensuring to reach all the nooks and crannies. Once cleaned, you can add your favorite essential oil to the atomizer, and the diffuser is ready to use as usual.
It is recommended to perform a deep cleaning of your oil diffuser once or twice a month to maintain its performance. By following these simple instructions, you can ensure that your diffuser continues to disperse delightful aromas in your home or office effectively.
Cleaning an Ultrasonic Diffuser
To clean an ultrasonic diffuser, follow these steps for thorough cleaning using alcohol:
- Turn off and unplug the diffuser to ensure safety and prevent any accidental damage.
- Fill the water reservoir halfway with filtered water. This step helps in the initial cleaning process.
- Run the diffuser for a few minutes with the water to allow it to dislodge any residue or buildup.
- Empty the water reservoir and wipe it clean using a soft cloth.
- Next, take a cotton swab and dip it in rubbing alcohol.
- Gently clean the ultrasonic plate, which is responsible for generating the mist in the diffuser, using the alcohol-soaked cotton swab.
- Rinse the water reservoir with water to remove any remaining cleaning solution, ensuring it is thoroughly cleaned.
- Lastly, wipe the reservoir dry with a clean cloth before refilling it with water and essential oils.
It is recommended to perform this deep cleaning once or twice a month to maintain the performance of your ultrasonic diffuser.
| Materials Needed: | Instructions: |
|---|---|
| Filtered water | Fill the water reservoir halfway with filtered water and run the diffuser for a few minutes. |
| Rubbing alcohol | Use a cotton swab dipped in rubbing alcohol to clean the ultrasonic plate. |
| Soft cloth | Wipe the water reservoir clean using a soft cloth. |
Turn Off and Unplug the Diffuser
Begin by turning off and unplugging your ultrasonic diffuser to ensure a safe cleaning process. This step is crucial to avoid any potential accidents or damage while handling the diffuser. Safety should always be a priority when maintaining your oil diffuser.
Step 1: Turn Off the Diffuser
Locate the power switch or button on your ultrasonic diffuser and switch it off. This will stop the diffuser from generating mist and allow you to clean it without any obstructions. It’s important to wait for the diffuser to completely power down before proceeding to the next step.
Step 2: Unplug the Diffuser
Once the diffuser is turned off, unplug it from the electrical outlet to ensure there is no power supply. This step eliminates the risk of electric shock and provides a safer environment for cleaning. Take care not to pull the cord too hard to avoid any damage to the diffuser or the power socket.
By following these simple steps, you can ensure that your ultrasonic diffuser is ready for a thorough cleaning. Remember to always prioritize safety and take the necessary precautions before handling any electrical appliance.
| Step | Action |
|---|---|
| Step 1 | Turn off the diffuser |
| Step 2 | Unplug the diffuser |
Clean the Water Reservoir
To clean the water reservoir of your ultrasonic diffuser, follow these steps for effective removal of any residue or buildup:
- Start by turning off and unplugging the diffuser to ensure safety.
- Remove the water reservoir from the diffuser.
- Fill a small basin or sink with warm water.
- Add a small amount of mild dish soap to the water and mix gently.
- Submerge the water reservoir in the soapy water and let it soak for 10-15 minutes.
- Using a soft brush or sponge, scrub the inside of the reservoir to remove any residue or buildup.
- Rinse the reservoir thoroughly with clean water to remove any soap residue.
- Wipe the reservoir dry with a clean, lint-free cloth.
By following these steps, you can ensure that your water reservoir is clean and ready for use in your ultrasonic diffuser. Remember to empty and refill the reservoir with fresh water each time you use the diffuser to maintain optimal performance.
Table: Recommended Cleaning Schedule
| Frequency | Steps |
|---|---|
| Every day | Empty and refill the water reservoir with fresh water for each use. |
| Weekly | Clean the water reservoir using the steps mentioned above. |
| Monthly | Perform a deep cleaning, including cleaning the ultrasonic plate, as explained in the following sections. |
Clean the Ultrasonic Plate
To ensure the efficient operation of your ultrasonic diffuser, it’s important to clean the ultrasonic plate using the following steps:
- Start by turning off and unplugging the diffuser to prevent any accidents or damage.
- Dip a cotton swab in rubbing alcohol and gently wipe the ultrasonic plate to remove any residue or buildup. Be careful not to apply too much pressure to avoid damaging the plate.
- Continue wiping the plate until it appears clean and free from any grime.
- Once the plate is clean, rinse the water reservoir with water to remove any remaining alcohol or cleaning solution.
- Wipe the reservoir dry with a clean cloth to ensure it is completely dry before reassembling the diffuser.
By regularly cleaning the ultrasonic plate, you can prevent mineral buildup and ensure that your diffuser continues to work effectively. It is recommended to perform this cleaning process once or twice a month, or as needed, to maintain the diffuser’s performance.
Now that you know how to clean the ultrasonic plate, you can confidently extend the lifespan of your diffuser and continue enjoying the benefits of aromatherapy in your home or office.
| Steps to Clean the Ultrasonic Plate |
|---|
| 1. Turn off and unplug the diffuser |
| 2. Dip a cotton swab in rubbing alcohol |
| 3. Gently wipe the ultrasonic plate |
| 4. Continue wiping until clean |
| 5. Rinse the water reservoir |
| 6. Wipe the reservoir dry |
Rinse and Dry the Reservoir
After cleaning the water reservoir and ultrasonic plate, make sure to rinse and dry the reservoir completely to maintain the diffuser’s performance. This step is crucial to remove any remaining cleaning solution and ensure that no residue or alcohol is left behind, which could affect the diffusion process.
To rinse the reservoir, fill it with filtered water and swish it around gently. Then, carefully pour out the water, making sure to discard it properly. Repeat this process until the water runs clear, indicating that all traces of alcohol and residue have been removed.
Once the reservoir is completely rinsed, use a clean, dry cloth or towel to wipe it dry. Pay special attention to any crevices or corners where water may have collected. Ensuring the reservoir is thoroughly dried will prevent any moisture from accumulating and potentially damaging the diffuser.
| Rinse and Dry the Reservoir Steps |
|---|
| 1. Fill the reservoir with filtered water. |
| 2. Gently swish the water around. |
| 3. Pour out the water and repeat until clear. |
| 4. Use a clean, dry cloth or towel to wipe the reservoir dry. |
Summary:
After cleaning the water reservoir and ultrasonic plate, it is important to rinse and dry the reservoir completely to maintain the optimal performance of your diffuser. Rinse the reservoir with filtered water until the water runs clear, and use a clean, dry cloth or towel to thoroughly dry it. Following these steps will ensure that no cleaning solution or residue remains, preventing any potential damage to the diffuser and allowing it to function effectively.
Cleaning an Atomizing Diffuser
Cleaning an atomizing diffuser effectively involves specific steps using alcohol and essential oil for optimal results. Atomizing diffusers, also known as nebulizing diffusers, operate differently from ultrasonic diffusers. They break down essential oils into fine particles, dispersing them into the air without the use of water. Due to this mechanism, a thorough cleaning routine is necessary to ensure the diffuser remains in good working condition.
Step 1: Turn off and unplug the diffuser
Prior to cleaning, make sure to turn off and unplug the atomizing diffuser. This step is crucial for safety reasons and to prevent any damage that may occur during the cleaning process.
Step 2: Clean with rubbing alcohol
To clean the atomizing diffuser, dampen a cotton swab with rubbing alcohol. Gently wipe the inside and outside of the glass reservoir, as well as the nozzle or outlet where the essential oil is diffused. This will help remove any residue or buildup that may have accumulated over time.
Step 3: Add essential oil and diffuse
Once the diffuser is clean and dry, add your chosen essential oil to the reservoir. Follow the manufacturer’s instructions for the recommended amount. Plug in the diffuser and turn it on, allowing the atomizing mechanism to disperse the essential oil into the air. Enjoy the aromatic benefits and therapeutic effects of your chosen essential oil.
| Step | Action |
|---|---|
| 1 | Turn off and unplug the diffuser |
| 2 | Clean with rubbing alcohol |
| 3 | Add essential oil and diffuse |
It is recommended to perform a deep cleaning of your atomizing diffuser once or twice a month to maintain its performance. Regular maintenance will help prevent clogs and ensure optimal diffusion of essential oils. By following these simple steps, you can enjoy the full benefits of your atomizing diffuser for years to come.
Conclusion
Regularly cleaning your oil diffuser with alcohol using the appropriate methods will help maintain its efficiency and enhance your overall aromatherapy experience. Cleaning an ultrasonic diffuser requires turning off and unplugging the device, cleaning the water reservoir with rubbing alcohol and a cotton swab, and ensuring thorough rinsing and drying. The ultrasonic plate should also be cleaned using alcohol to remove any residue or buildup and ensure optimal performance.
For atomizing diffusers, the cleaning process involves turning off and unplugging the diffuser and using a cotton swab dipped in rubbing alcohol to clean the device. After cleaning, essential oils can be added to the atomizer, and the diffuser can be used as usual. It is important to note that atomizing diffusers operate differently from ultrasonic diffusers and require their specific cleaning process.
To maintain the performance of your oil diffuser, it is recommended to perform a deep cleaning once or twice a month. This will help remove any residue or buildup that may affect the diffuser’s efficiency. By following these cleaning methods, you can ensure that your oil diffuser continues to provide you with the desired aromatherapy benefits for an extended period.
FAQ
How do I clean an ultrasonic diffuser with alcohol?
To clean an ultrasonic diffuser with alcohol, first, turn off and unplug the diffuser. Then, fill the water reservoir halfway with filtered water and run it for a few minutes. Empty and wipe the reservoir, and clean the ultrasonic plate with a cotton swab dipped in rubbing alcohol. Rinse the reservoir with water and wipe it dry.
How do I clean an atomizing diffuser with alcohol?
To clean an atomizing diffuser with alcohol, turn off and unplug the diffuser. Clean it with a cotton swab dipped in rubbing alcohol. Add essential oil to the atomizer and diffuse as usual.
How often should I deep clean my oil diffuser with alcohol?
It is recommended to do a deep cleaning of your oil diffuser using alcohol once or twice a month to maintain its performance.


